Установка iTunes на Ubuntu 20.04 LTS (Focal Fossa)
iTunes – это приложение для музыки Apple, которое действует как медиаплеер, менеджер мультимедиа, утилита управления мобильными устройствами и клиентское приложение для iTunes Store. По умолчанию iTunes доступен только для систем MacOS и Windows. Если вы хотите установить его в системах на базе Linux, то это можно сделать только через wine. Хотя iTunes можно установить на системы Linux, но не стоит ожидать, что оно будет работать идеально, поскольку некоторые функции могут быть недоступны на системах Linux. Здесь мы рассмотрим шаги установки iTunes на системы Ubuntu 20.04 LTS.
Таблица содержания
- Введение
- Необходимые условия
- Обновление сервера
- Установка Wine
- Установка Winetricks (по желанию)
- Настройка Wine для Windows 10
- Загрузка iTunes
Необходимые условия
a) У вас должна быть работающая система Ubuntu 20.04 LTS.
b) У вас должен быть доступ к sudo или root, чтобы выполнять привилегированные команды.
c) Вашей системе должны быть доступны утилиты apt, dpkg и wget.
Обновление сервера
Необходимо сначала синхронизировать пакеты вашей системы с последними доступными версиями из репозитория Ubuntu по умолчанию, используя команду sudo apt update как показано ниже. Это также обновит кэш пакетов для любых недавних изменений репозитория, выполненных в системе.
Если какие-либо установленные пакеты требуют обновления, то выполните sudo apt upgrade.
Установка Wine
Если ваша система 64-битная, то вам необходимо включить 32-битную архитектуру с помощью команды dpkg ниже.
Затем вам необходимо создать каталог ключей в /etc/apt для загрузки и добавления ключа.
Теперь загрузите ключ в каталог /etc/apt/keyrings с помощью команды wget ниже.
Следующим шагом будет добавление репозитория в каталог sources.list.d для загрузки и установки пакета Wine оттуда. Это можно сделать с помощью команды wget ниже.
Для обновления информации о новом добавленном репозитории в кэше пакетов вам необходимо выполнить команду sudo apt update, как показано ниже.
Далее необходимо установить пакет winehq stable из репозитория с помощью команды sudo apt install –install-recommends winehq-stable, как показано ниже.
Установка Winetricks (по желанию)
Если вам необходимо установить iTunes через Winetricks, то вы можете установить этот пакет, используя команду sudo apt install winetricks, как показано ниже.
Настройка Wine для Windows 10
По умолчанию wine будет настроен на Windows 7, поэтому перед установкой iTunes вам необходимо изменить его на Windows 10. Для этого вам нужно выполнить команду winecfg в терминале. Затем измените версию Windows на Windows 10 в настройках Wine, как показано ниже.
Загрузка iTunes
Следующим шагом будет загрузка последней версии iTunes с официального сайта, нажав на ссылку Скачать iTunes для Windows сейчас (64-разрядная) как показано ниже.
Установка iTunes
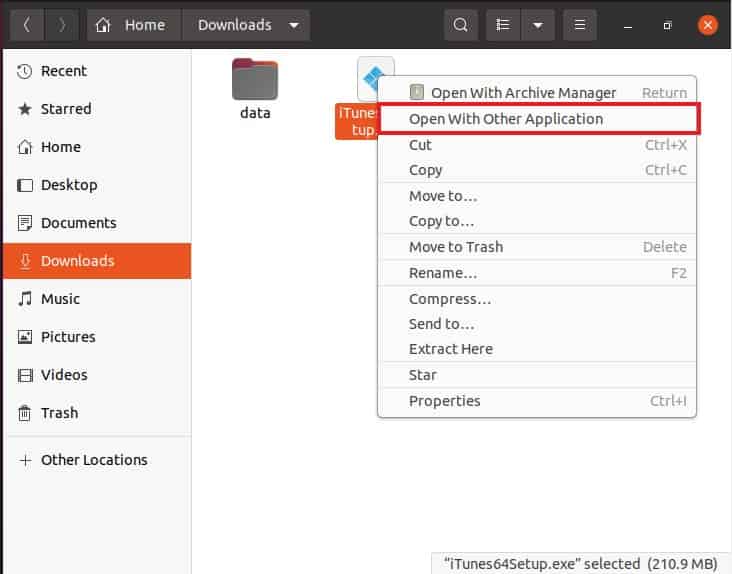
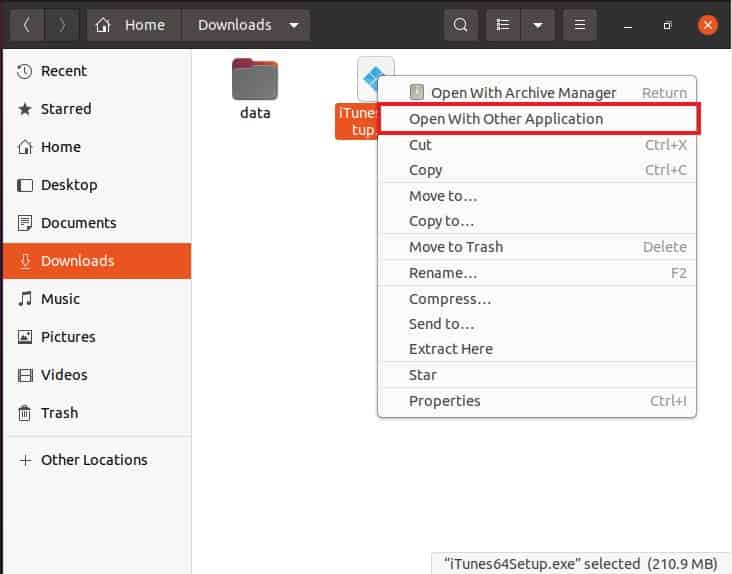
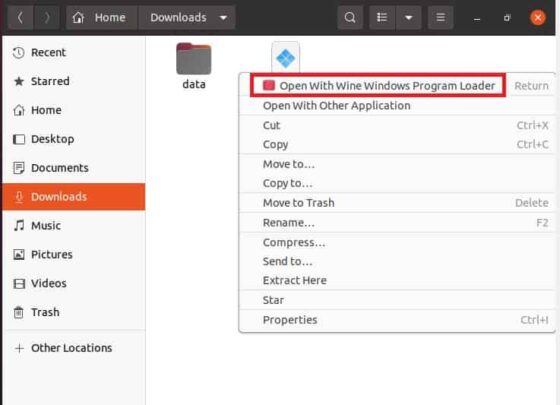
После успешной загрузки вы можете перейти к файлу и щелкнуть правой кнопкой мыши по нему. Затем выберите опцию Открыть с другим приложением, как показано ниже.
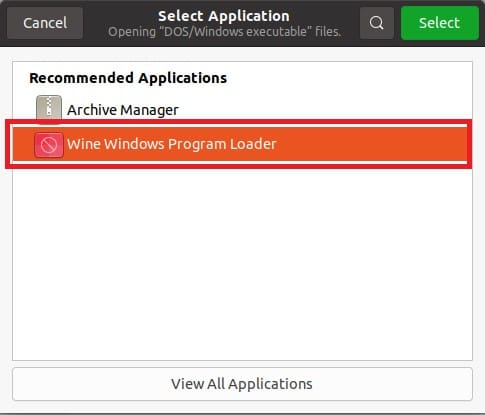
Здесь вам нужно выбрать Wine Windows Program Loader, чтобы начать установку приложения.
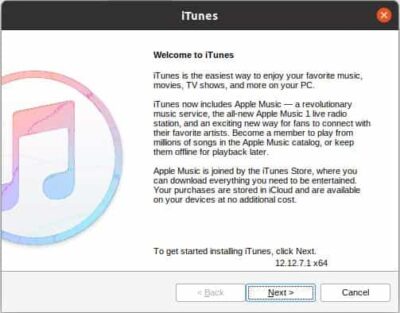
Вы получите следующий мастер установки, в котором нужно нажать Далее для продолжения.
Выберите соответствующую опцию вместе с языками по умолчанию iTunes, а затем нажмите Установить для начала установки.
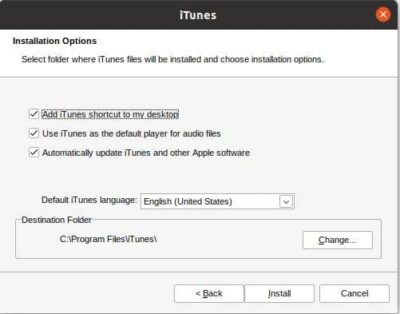
Может появиться сообщение о том, что AutoRun отключен. Чтобы включить, вы можете выбрать Да, или оставьте его отключенным, выбрав Нет.
Установка начнется, и ее ход можно отслеживать на следующем экране.
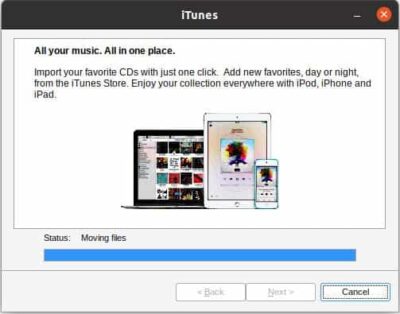
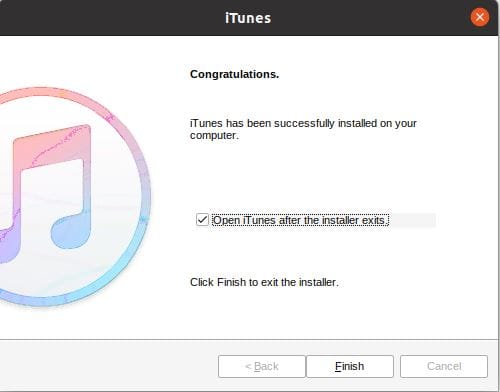
Через несколько минут установки вы увидите нижеизображенный экран, подтверждающий успешно установленный iTunes. Нажмите Завершить, чтобы закрыть настройку и запустить iTunes.
Если ваш дисплей установлен на менее чем 1024×768, вы увидите нижеизображенное сообщение с запросом настройки разрешения в настройках дисплея. Затем нажмите Продолжить.
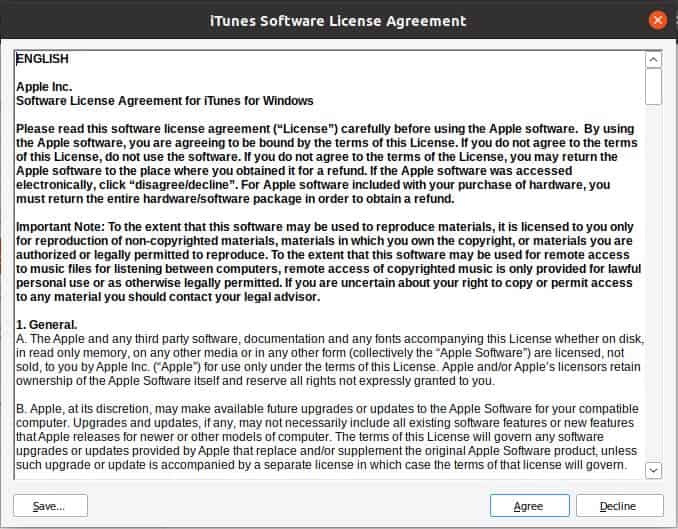
Вас попросят принять нижеизображенное соглашение, и затем приложение iTunes будет успешно запущено.
Деинсталляция iTunes
После использования iTunes вы можете выбрать деинсталляцию из вашей системы, вернувшись к загруженному файлу и открыв его снова через Wine Windows Program Loader, как показано ниже.
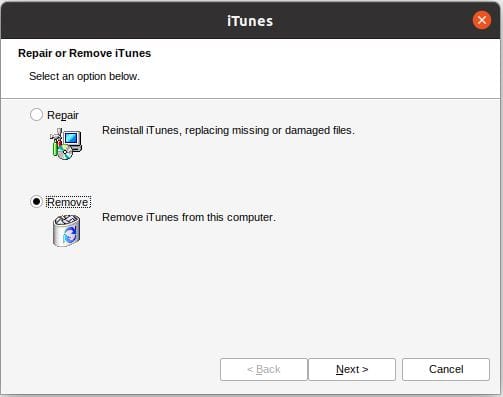
Вы увидите следующий экран для выбора варианта Восстановление или Удаление пакета iTunes. Выберите Удалить, а затем нажмите Далее.
Вас попросят подтвердить полное удаление iTunes. Нажмите Да для продолжения.
iTunes-files должны быть удалены с вашей системы. В случае, если вы не видите, что iTunes удаляется из вашей системы, вы также можете выполнить команду деинсталляции через терминал, используя команду wine uninstaller. Затем выберите iTunes из списка и нажмите Удалить, чтобы удалить его из вашей системы.
Это пошаговое руководство для начинающих показывает, как установить iTunes в Ubuntu 22.04 и 23.10.
Установка приложения Windows легка в Ubuntu и других дистрибутивах Linux благодаря Wine. Тем не менее, для новичков установка и настройка Wine могут быть не такими простыми.
Установка iTunes с помощью Bottles в Ubuntu
В этой статье я покажу, как установить iTunes с помощью Bottles (wine runner), чтобы сделать все как можно проще.
Примечание: iTunes, работающий с wine, НЕ обнаруживает iPhone, по крайней мере, у меня. Но это нормально для синхронизации музыки через iCloud! Для простой передачи музыкальных файлов, VLC – хорошая альтернатива.
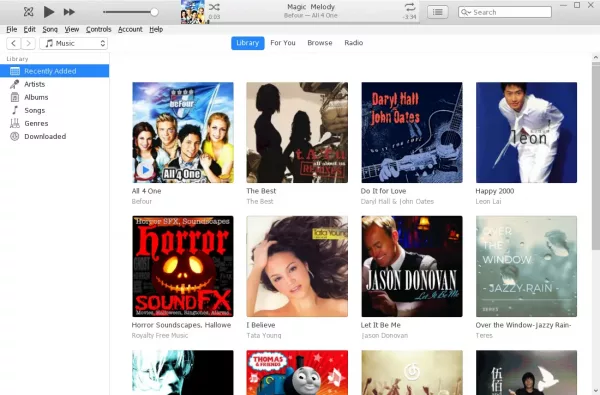
Установка Bottles
Как уже упоминалось выше, Bottles – это wine runner, который делает запуск Windows-приложений в Linux очень простым. Единственный недостаток заключается в том, что он доступен только в виде Flatpak и работает в песочнице.
- Нажмите Ctrl+Alt+T на клавиатуре, чтобы открыть терминал. Когда он откроется, выполните команду для активации поддержки Flatpak:
sudo apt install flatpak
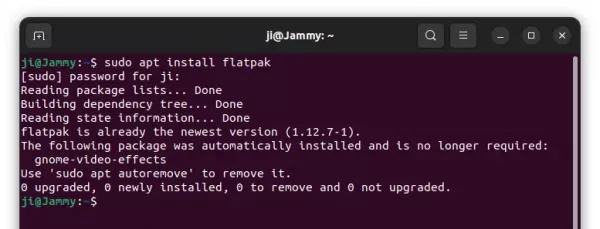
- Затем установите Bottles как Flatpak, выполнив команду:
flatpak install https://dl.flathub.org/repo/appstream/com.usebottles.bottles.flatpakref
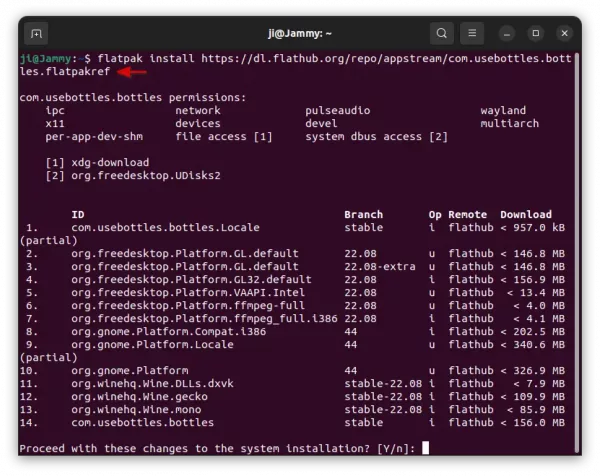
Настройка разрешений для Bottles
Если вы хотите, чтобы приложения, установленные через Bottles, были видимы в меню Пуск и/или панели задач, а также имели доступ к музыкальным файлам в других папках (например, папке Музыка), то вам необходимо вручную предоставить разрешения.
- Чтобы позволить Bottles добавлять приложения в меню Пуск, выполните команду в терминале:
flatpak install https://dl.flathub.org/repo/appstream/com.github.tchx84.Flatseal.flatpakref
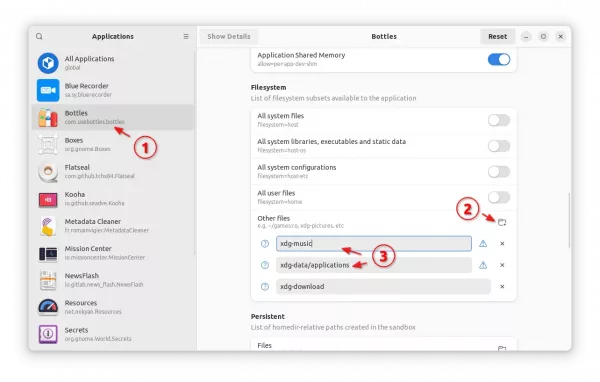
Загрузка iTunes (exe)
На сайте Apple доступно только скачивание последней версии iTunes, которая плохо работает (и даже пока не работает) с текущей версией Wine.
Для старых версий есть сторонний сайт, который предоставляет большой список загрузок. Все URL-адреса загрузки на этой странице официальные (указывают на apple.com), сайт лишь перечисляет их для вас.
В моих испытаниях версия iTunes 12.9.x – самая последняя версия, которая устанавливается, но она часто вылетает. iTunes 12.8.0.150 – последняя версия, которая хорошо работает.
Примечание: Wine и Bottles постоянно обновляются, поэтому новые версии iTunes могут заработать в будущем. Попробуйте сами.
Установка iTunes на Linux: Полный гайд
Для того чтобы установить iTunes на свой Linux-десктоп, вам потребуется использовать приложение Bottles. В этой статье мы покажем вам, как сделать это шаг за шагом.
Запуск приложения Bottles
- В первую очередь, найдите и запустите приложение Bottles из меню Пуск или обзора Действия, в зависимости от вашей рабочей среды.
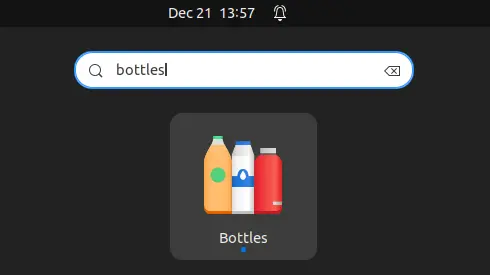
Примечание: если у вас впервые устанавливается приложение Flatpak, вам нужно будет выйти из системы и затем снова войти, чтобы значок приложения стал видимым в меню Пуск. Вы можете также запустить команду flatpak run com.usebottles.bottles для запуска его из терминала.
Создание нового Bottle
Когда вы запустите приложение, автоматически будет создана конфигурация и настроен Wine для нового Bottle, который вы только что создали.
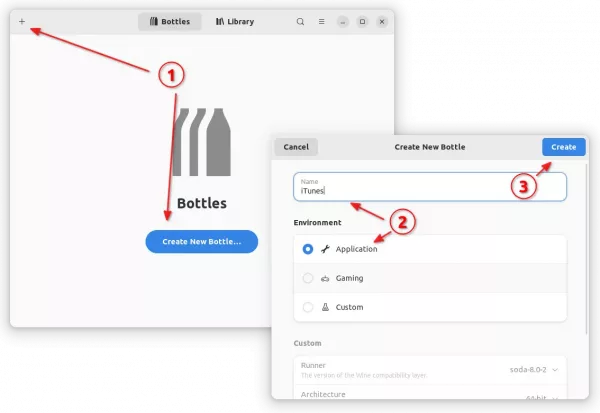
После завершения этого процесса, щелкните, чтобы открыть страницу Детали для нового Bottle. Нажмите на кнопку Запустить исполняемый файл, затем просмотрите и выберите файл iTunes64Setup.exe, который вы загрузили на предыдущем шаге.
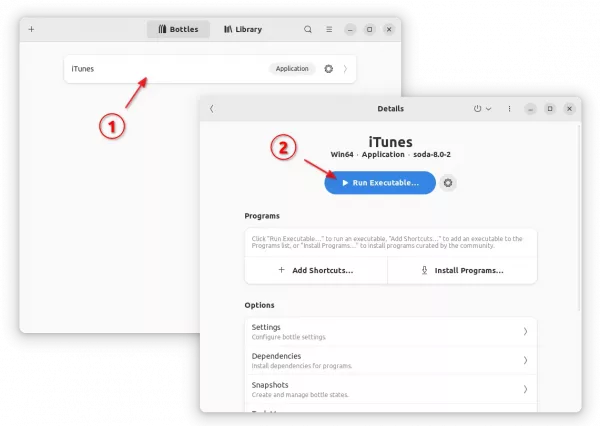
Обратите внимание, что при выборе файла в диалоговом окне выбора файлов вам может понадобиться переключить нижний фильтр на Все файлы, чтобы сделать файл .exe видимым.
Запуск iTunes
Для запуска iTunes перейдите на страницу Детали для Bottle в приложении Bottles и щелкните на символ треугольника ▸.
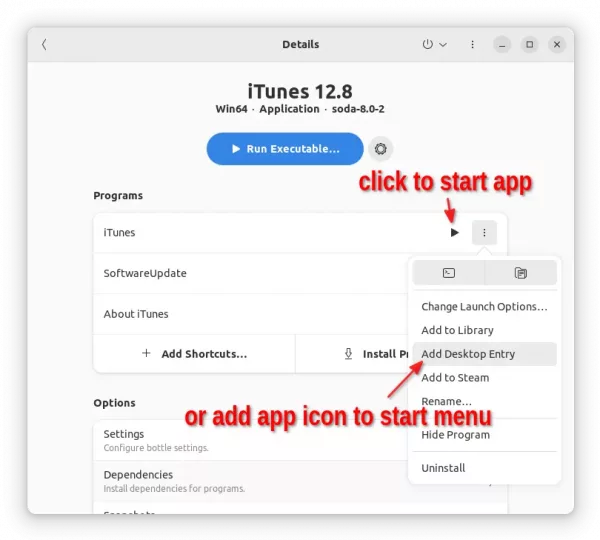
После этого вы сможете запустить iTunes из меню Пуск, точно так же, как и другие приложения, установленные из Ubuntu Software.
Удаление iTunes и Bottles
Чтобы удалить iTunes, просто запустите приложение Bottles, перейдите на страницу с подробной информацией об iTunes и используйте опцию меню в правом верхнем углу ⋮ для удаления Bottle.
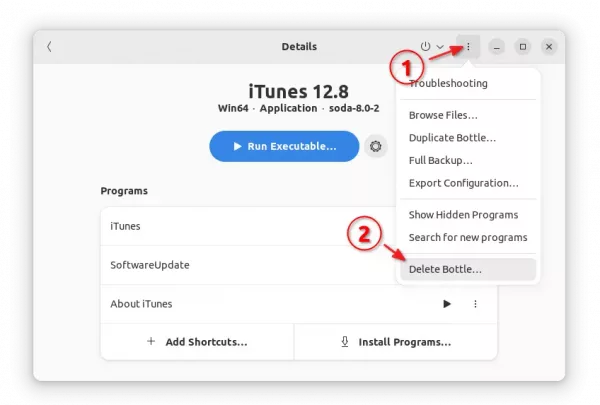
Для удаления приложения Bottles откройте терминал (Ctrl+Alt+T) и выполните команду:
flatpak uninstall --delete-data com.usebottles.bottles
Если пропустить --delete-data, то приложения, установленные через Bottles, будут сохранены.
После удаления Bottles также выполните команду для удаления неиспользуемых рантаймов и освобождения места на диске:
flatpak uninstall --unused
Ищете способ установить iTunes на свой Linux-десктоп? Тогда не ищите дальше, потому что мы покажем вам все возможные способы загрузить и установить iTunes на ваше Linux-устройство.
Но возможно ли это? Есть ли версия iTunes для Linux? Ответ на этот вопрос вы найдете в этой статье. Приступим!
iTunes is currently not officially available for any Linux distro. It only supports Windows desktops at the moment. And this may remain like this shortly.
But does that mean you can’t get iTunes on your Linux machine at all? Well, technically, you can. However, to do that, you need help from third-party systems. This means you won’t get the best performance or convenience.
Then there are some other methods available as well, as you will discover further down this post.
We will discuss possible methods for downloading and installing iTunes on Linux. For this tutorial, we will be using Ubuntu. However, it will work for almost any distro (use the appropriate commands), such as Debian, Zorin OS, Arch, Fedora, OpenSUSE, Linux Mint, Manjaro, and so on.
Install iTunes via Wine
As we said, you can run many Windows apps and games on Linux thanks to Wine. So you need to install and set up Wine first.
First, run these three commands:
$ sudo dpkg –add-architecture i386 $ sudo mkdir -pm755 /etc/apt/keyrings $ sudo wget -O /etc/apt/keyrings/winehq-archive.key https://dl.winehq.org/wine-builds/winehq.key
For other distros, please look up their official instructions page.
$ sudo wget -NP /etc/apt/sources.list.d/ https://dl.winehq.org/wine-builds/ubuntu/dists/jammy/winehq-jammy.sources
When that’s done, update your package information with this command:
$ sudo apt update
Lastly, install Wine with any of these commands:
$ sudo apt install –install-recommends winehq-devel $ sudo apt install –install-recommends winehq-stable
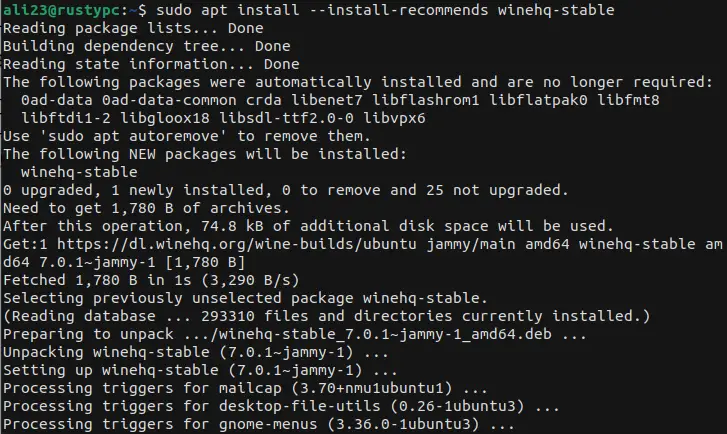
Once that gets installed, head over to the iTunes download page and download the EXE file for Windows. It’s a big file, so wait for it to download fully.
Note: You might face a dark black home screen on iTunes. This is a common issue. One workaround is to install an older version (12.9.3 and older). But we recommend going with the second method in this tutorial.
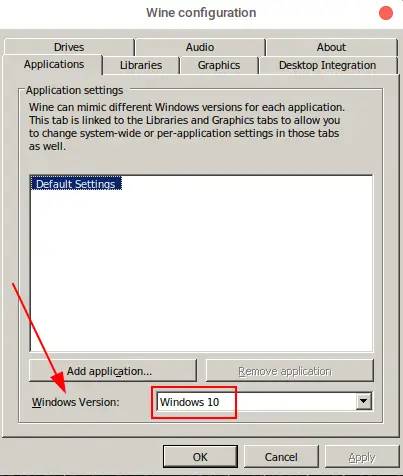
Meanwhile, you need to do some configuration on Wine. Run this command:
It should bring a configuration window. From the “Windows Version” dropdown menu, choose Windows 10. Click “Apply” and then “OK.”
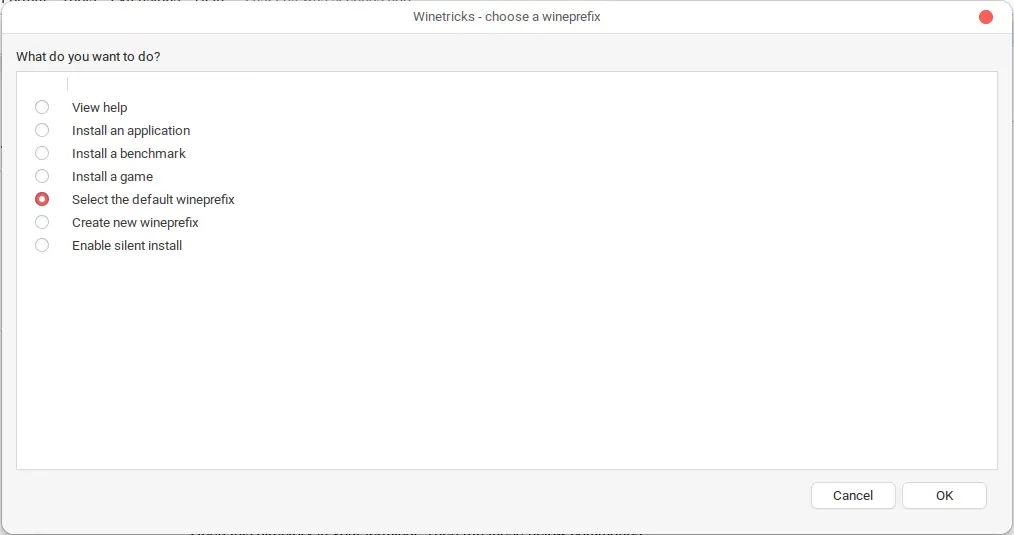
Now you need to install winetricks. First, run these commands:
$ sudo apt remove winetricks $ sudo apt install winetricks
Next, you need to get the gdiplus library. Use this command:
You should see a popup window.
By this time, the iTunes file download should be finished. Navigate to the directory where you downloaded the installation file.
Open this directory in your terminal. Then run these below commands:
$ export WINEARCH=win32 $ export WINEPREFIX=~/.wine32 $ wine iTunesSetup.exe
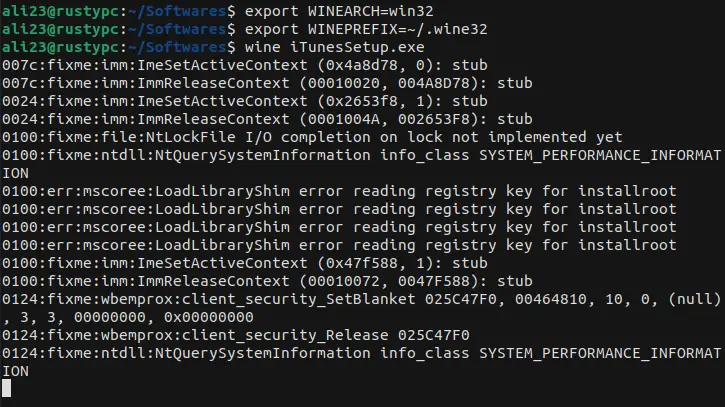
If you saved the file with a different name, then use that name instead of “iTunesSetup”.
There’s an alternative GUI way to do this.
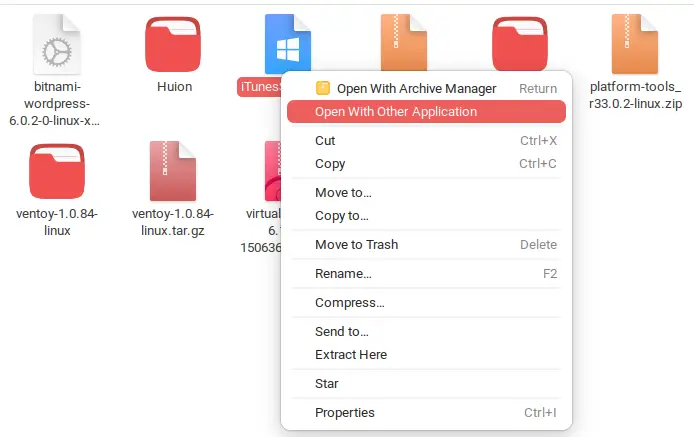
After navigating to the download folder, right-click on the EXE file. After that, choose “Open With Other Application.”
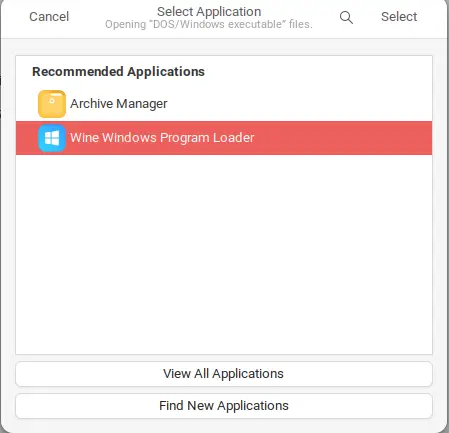
Then choose “Wine Windows Program Loader”.
Either way, you should get a prompt about the Wine Mono Installer. Click “Install”.
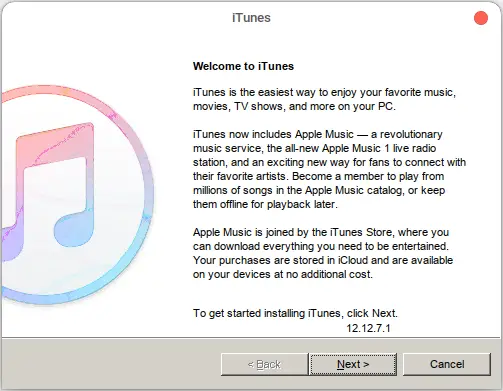
If all goes well, you should see the iTunes welcome page. Press “Next”.
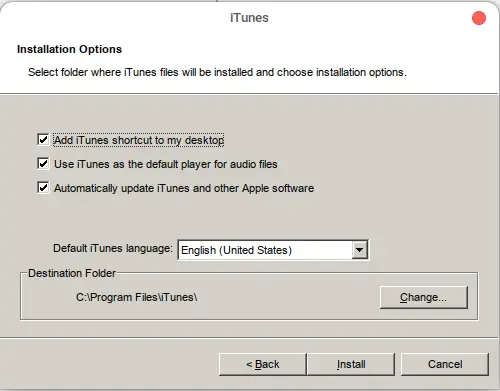
Change your preferences, such as installation location, updates, and desktop shortcuts. When done, click “Install.”
You will get another prompt about AutoRun. Press “Yes.” The installation process will begin.
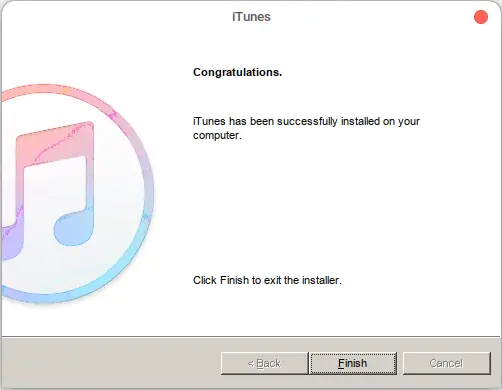
If the installation is successful, you should see a congratulations message. Press “Finish.”
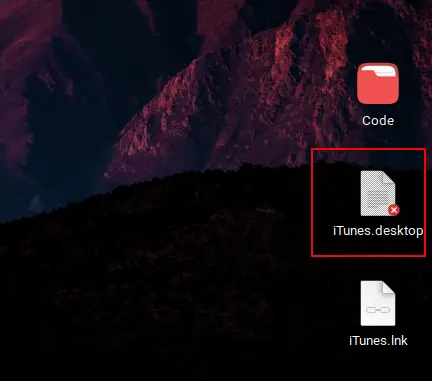
Now go to your desktop directory. You should see an “iTunes.desktop” icon.
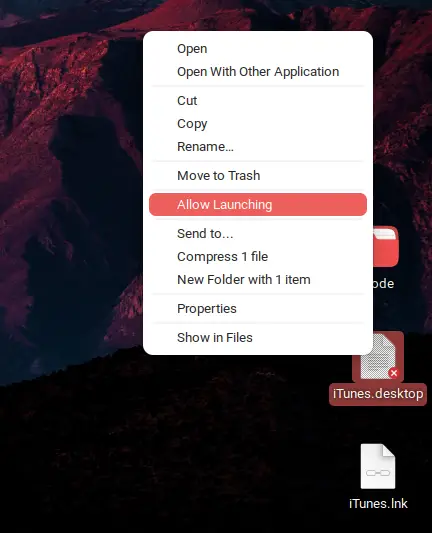
Right-click on it and then press “Allow Launching.”
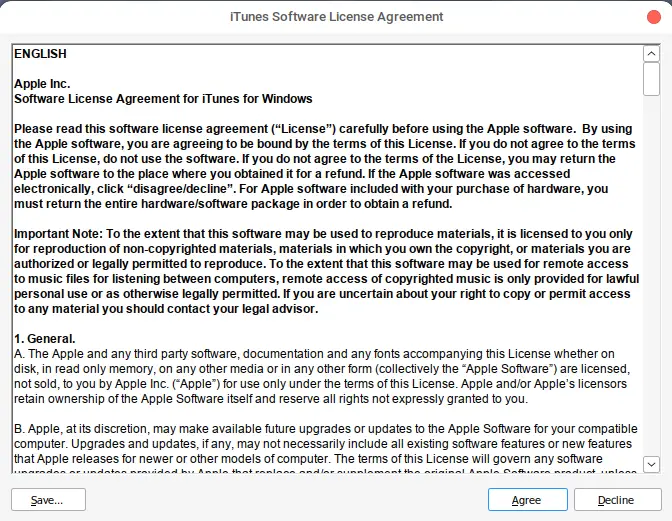
The icon will change. Double-click the new icon to launch iTunes. You will see a license agreement window. Click “Agree” to proceed.
iTunes will launch. Use it as you would on a Windows machine.
Pros
Read Also: How to install Outlook on Ubuntu Linux
Install iTunes via Virtual Machine
This method needs a lot of setting up. But in the long run, this happens to be the better solution.
Once you’re done with that, run your Windows VM.
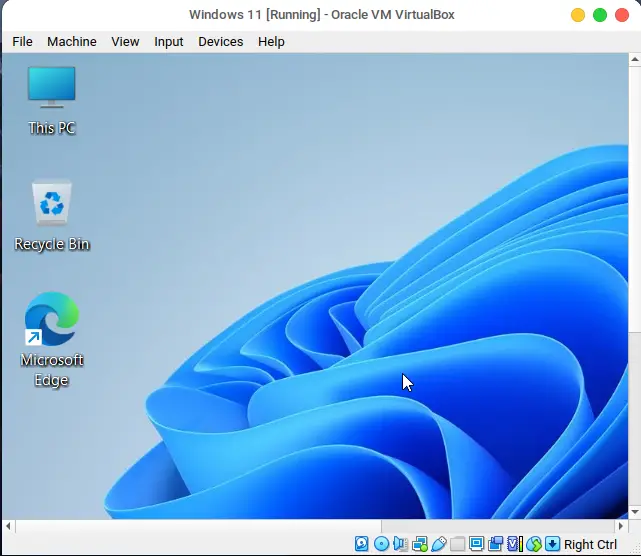
Now download the iTunes software from Microsoft Store. You might be asked to enter your PIN.
Once the download is complete, search for iTunes in the search bar.
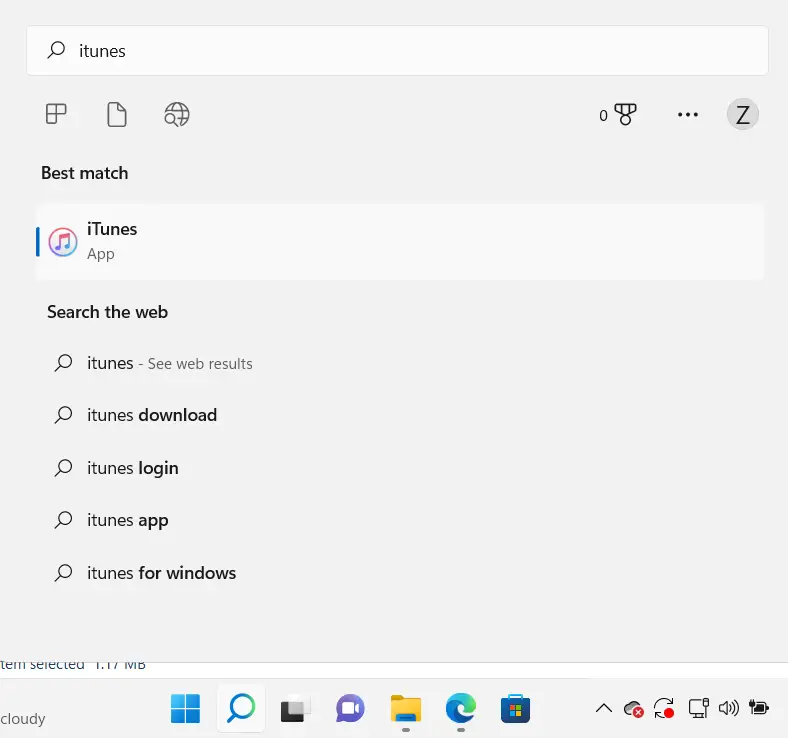
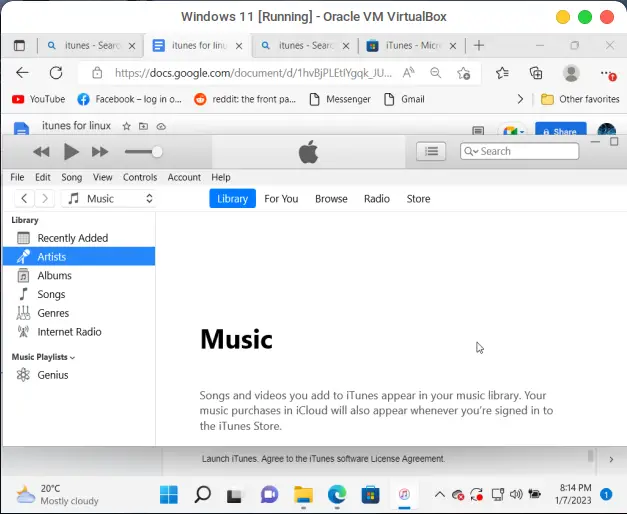
Launch iTunes. Agree to the Software License Agreement. iTunes will start.
ITunes Alternatives for Linux
Linux offers much software that can do as decent a job as iTunes, if not better. Whether you want to use it for playing audio or video files, transferring files and data, or syncing content, there is a good chunk of alternative options in the Linux world.
Media Player
If you only need iTunes for playing media, you can use many available media players on Linux. Some of the best ones include:
File Transferring
If you’ve been using iTunes for a long time, we can understand how badly you are in need of it on your Linux device. However, compatibility issues stay as they used to between Apple and Linux devices. That is, Apple rarely releases any software that is natively supported by Linux.
Although there are several ways you can get iTunes installed on Linux, the real question is whether you should do it or not. Firstly, not everyone is tech-savvy.
The point is, going through all the hassle only to get iTunes set up on Linux, and it may not even function properly, is not worth the effort. So it’s just better to use alternative software. This is our recommendation.
Final Thoughts
This tutorial shows you how to download and install it on Linux. We’ve shown you two different methods—each having its pros and cons. So you can weigh both methods and choose the one that suits you the most.
After that, we’ve shown you some iTunes alternatives for Linux that you should try out. Of course, you won’t be able to replace it fully, but you can get the job done for the most part.
Lastly, we discussed if you should try to install iTunes on Linux. The final choice is yours, but keep in mind all the points we said.
I need to get access to Apple Music on Linux as I just abandoned the Windows OS. But it appears that iTunes is in no way supported for Linux yet? I’ve searched around but didn’t find a very simple nor clear step-by-step guide to get iTunes installed on Linux. Could you advise please?
Can I Play Apple Music on Linux?
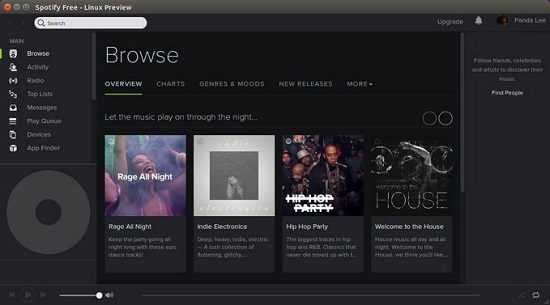
How to Listen to Spotify Music on Linux with Ease
This post covers the top 3 easiest ways to install Spotify Music on Linux.
Play Apple Music on Web
You can access Apple Music directly from your favorite web browser, such as Firebox, Chrome, or Chromium.
With no additional software required, here’s how to access the Apple Music web app on popular web browsers.
Transfer Apple Music to Linux
While Apple hasn’t officially introduced iTunes for Linux, you can still enjoy your Apple Music collection on your Linux system by transferring music files from Windows or macOS. The ViWizard Apple Music Converter is a powerful tool that allows you to download your Apple Music tracks and convert them into widely supported formats, making them accessible on Linux and other platforms. With ViWizard, you can enjoy Apple Music on your Linux system without relying on a direct iTunes installation.
Why Choose ViWizard Apple Music Converter?
If you wish to enjoy Apple Music offline on your Linux system without relying on the Apple Music or iTunes app, ViWizard Apple Music Converter is the best solution that allows you to play Apple Music songs on Linux offline by removing DRM (Digital Rights Management) protection from Apple Music tracks. You can them stream DRM-free music files on your Linux system without the need for iTunes or any proprietary software, making your music accessible across platforms.
ViWizard is available for both Mac and Windows OS, it empowers you to seamlessly and losslessly convert DRM-locked Apple Music songs into widely supported formats, including MP3, AAC, WAV, FLAC, and more — all compatible with Linux.
Key Features of ViWizard Audio Converter
Free Trial Free Trial
Security verified. 5, 481,347 people have downloaded it.
Converting Apple Music on Your Windows/Mac System
Firstly, launch ViWizard Apple Music Converter on your Mac or PC. Then click the Load from Library button at the top center to load the your Apple Music library to the converter. Or you can directly drag the downloaded Apple Music files from local folder to the conversion window.
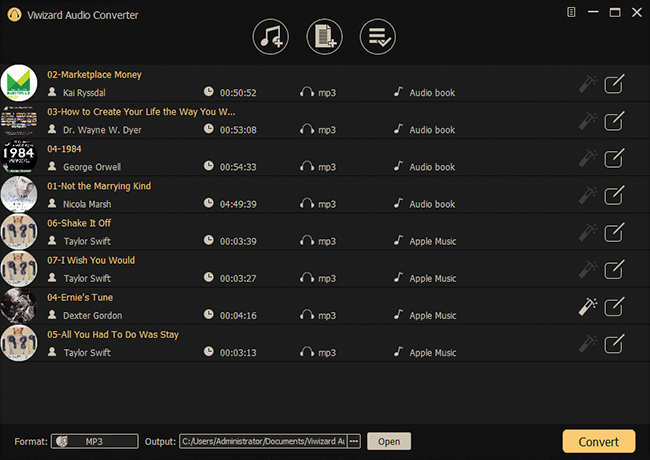
Set Output Format for the Apple Music
Then click the Format option at the bottom left to select the output format according to your requirements. Here we recommand you to set MP3 as the output format. You can also adjust the parameters like codec, channel, sample rate or bit rate if you like. Tap the OK button to save.
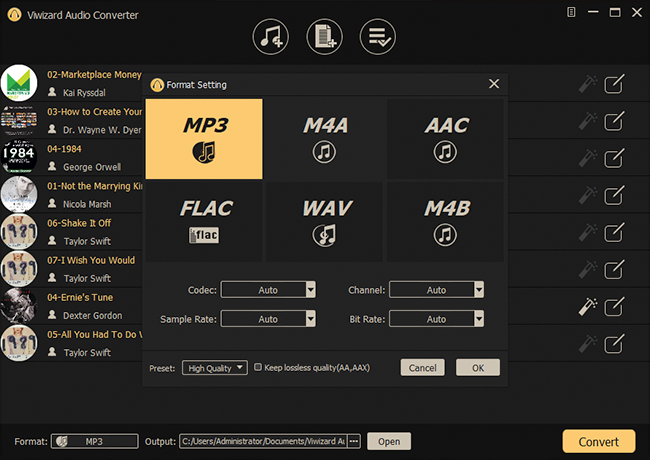
Start to Remove DRM Lock from Apple Music
Now click the Convert button and let it to convert the DRM Apple Music streams to non-DRM formats at up to 30X faster speed. Once converted, you’ll locate the DRM-free Apple Music songs by tapping the History icon.
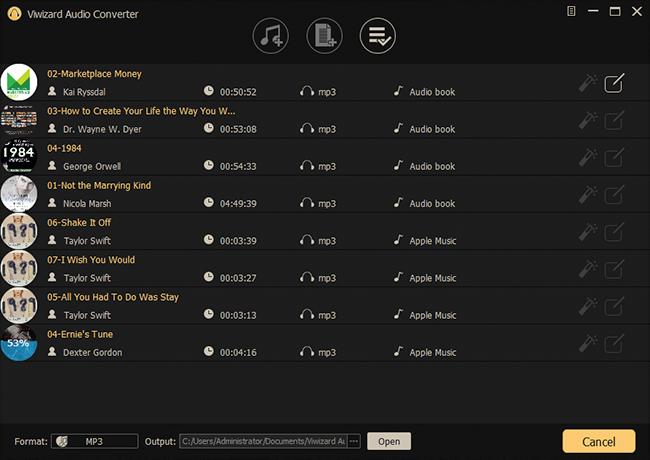
Transferring Apple Music to Your Linux System
Use familiar methods like USB drives, cloud storage, or network sharing to transfer the converted music files from your Windows or macOS computer to your Linux system.
How to Install Apple Music on Linux
The most direct route to bringing Apple Music to your Linux desktop involves installing iTunes through a virtual machine, such as WINE or VirtualBox. But now if you want to install Apple Music on your Linux system, you must check Cider first.
Install Apple Music via Cider
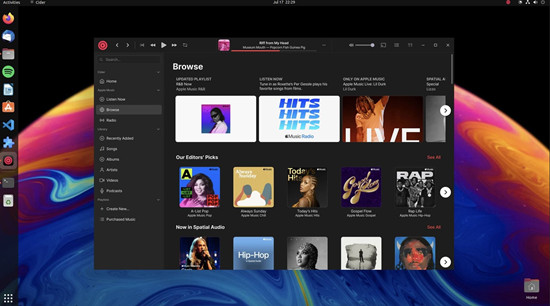
Meet Cider, your new best friend for enjoying Apple Music on your Linux system. Cider is an open-source application designed by a passionate community to bring the Apple Music experience to Linux, alongside Windows and macOS (although Apple already has their official app for the latter).
Why Choose Cider?
Here’s how to get Cider on your Linux machine. If you’re on Windows, Cider’s got you covered! You can install it from the Microsoft Store, use the Winget tool, or grab an installer from the GitHub project page.
With Cider, you’re not just getting an Apple Music player; you’re getting a polished, Linux-friendly experience that lets you enjoy your music your way.
Install Apple Music via Wine
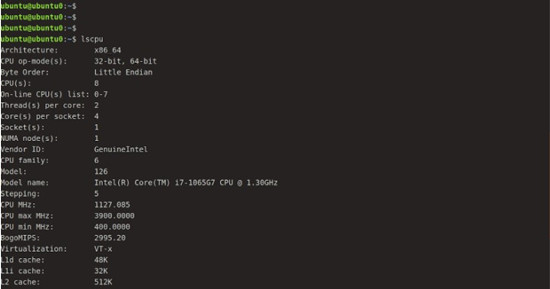
Getting Wine on Your Linux System
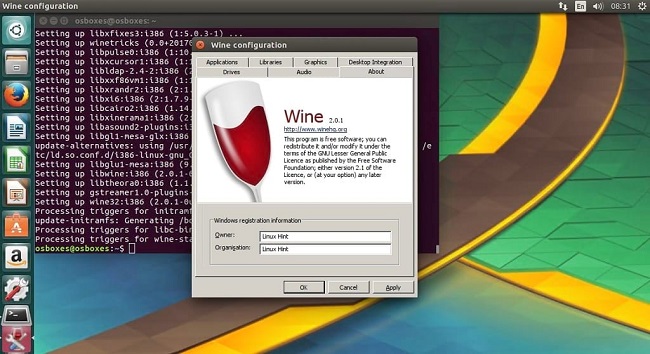
For the simplest installation, use the Ubuntu repository:
sudo apt-get install wine64
Alternatively, you can install Wine from WineHQ Repository, which provides newer versions of Wine.
Setting Up Wine and Installing Apple Music
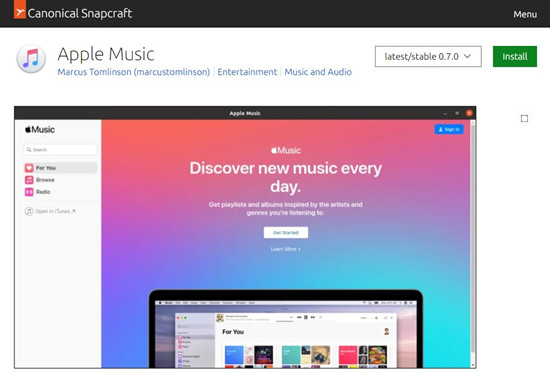
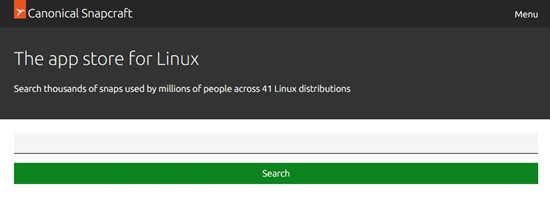
The Snap Store is your one-stop shop for hassle-free software installation on Linux. You can discover the easiest way to install Apple Music with automatic updates and added security through sandboxing.
Installing "Apple Music for Linux" in Your Linux System
Install Apple Music via VirtualBox
Running iTunes on Linux may seem like a puzzle, but with VirtualBox, a powerful virtualization tool for Linux, it becomes as straightforward as playing your favorite song. Set up VirtualBox to create a virtual Windows environment where you can run iTunes seamlessly alongside your Linux operating system.
Getting VirtualBox on Your Linux System
By using ViWizard Apple Music Converetr, you can successfully eliminate DRM protection from your Apple Music tracks and transfer them to your Linux system. This allows you to relish your favorite tunes offline without the need for iTunes or DRM constraints, enhancing your Linux music experience.
You May Be Interested
An experienced writer of ViWizard who is obsessed about technology, music, movie, and software.
Leave a Comment ()
Apple еще не запустила iTunes для Linux. Однако вы по-прежнему можете получить доступ к своей музыкальной библиотеке Apple с помощью Вино.
В этом руководстве я расскажу, как настроить iTunes для Linux. Итак, давайте включаемся!
Как скачать iTunes для Linux
1. Сначала установите и настройте Вино в вашей системе.
2. Посетить Официальный сайт iTunes и загрузите установочный файл в соответствии со спецификациями вашей системы.
3. Убедитесь, что установщик iTunes успешно загружен.
5. Нажмите CTRL + ALT + T чтобы открыть терминал и запустить «вино iTunes _installer_filenameКоманда.
6. Нажмите "Соглашаться», чтобы принять Лицензионное соглашение на программное обеспечение iTunes.
7. Выберите Destination Folder для iTunes и других вариантов установки.
8. Подождите несколько секунд, пока iTunes установится.
9. После завершения установки запустите iTunes с рабочего стола Linux.
10. Наконец, войдите в магазин iTunes, и все готово!
Вы также можете быть заинтересованы в:
Теперь вы знаете, как настроить iTunes для Linux. Не стесняйтесь поделиться своим мнением в комментариях ниже!
Эксперт по Linux
Шарка — технический автор контента, который специализируется на создании высококачественного, ценного и оптимизированного для SEO контента. Она предоставляла контент, связанный с различными операционными системами, языками программирования, приложениями с графическим интерфейсом, информационными технологиями и технологиями. Ее внимание сосредоточено на том, чтобы сделать технологию понятной и добиться результатов за счет аутентичности.
Features of iTunes
Firstly, we need to add the repository of Wine, so to add we need to download the WineHQ GPG key using the wget command.
Downloading WineHQ GPG Key
Add Wine Repository
Once we have downloaded the WineHQ GPG Key, we need to add it to our system repositories. So to add, execute the below command in the terminal.
sudo add-apt-repository ‘deb https://dl.winehq.org/wine-builds/ubuntu/ groovy main’
Update the System
After adding the Wine repository, update the system repositories using the apt package manager. Execute the below command.
Step 4
Once the system gets updated with the late repositories, we need to install the Wine HQ packages on our system by using the below installation command.
Download iTunes Setup
As the installation of Wine is completed, we need to download the iTunes setup as per our system architecture, we can download it from the official website of Apple or by using the below wget command.
sudo wget https://secure-appldnld.apple.com/itunes12/001-80053-20210422-E8A3B28C-A3B2-11EB-BE07-CE1B67FC6302/iTunes64Setup.exe
Install iTunes using Wine
Selecting Wine Windows Program Loader
Completing the Setup
After completing the installation, locate the iTunes shortcut icon on the Desktop. Right-click on the icon and select the option “Allow Launching” to ensure that the application is permitted to run. This step grants necessary permissions for the successful launch of iTunes on your Linux system.
Open the Application
Click on the iTunes application icon on your Desktop to open the application on your Linux operating system. This action will launch Wine, the compatibility layer, allowing iTunes to run seamlessly on Linux. Ensure that you’ve completed the previous steps correctly, including the installation of Wine and the successful setup of iTunes using the Wine Windows Program Loader. Upon clicking the icon, iTunes should open without any issues, providing access to its features on your Linux system.
Дополнительно о техподдержке
 Почему телефон не видит беспроводные наушники по bluetooth
 Горячая линия Сургутнефтегазбанка, круглосуточный телефон службы поддержки СНГБ, бесплатный номер 8800
 Железнодорожный и Советский районы Аварийно-диспетчерская служба электросети в Советском районе – отзывы, фото, цены, телефон и адрес – Госуслуги – Ростов-на-Дону –
 Избегайте распространенных ошибок в процессе загрузки Windows 10
 Повышение скорости мобильного Интернета: советы экспертов для более быстрого просмотра
 Скромный отзыв после перехода с intel
 Руководство по устранению неполадок Компьютер не выключается после обновления Windows 10
 68 отделений Кредит Европа Банк – телефон горячей линии, адреса отделений и филиалов на карте, режим работы, ближайшее метро